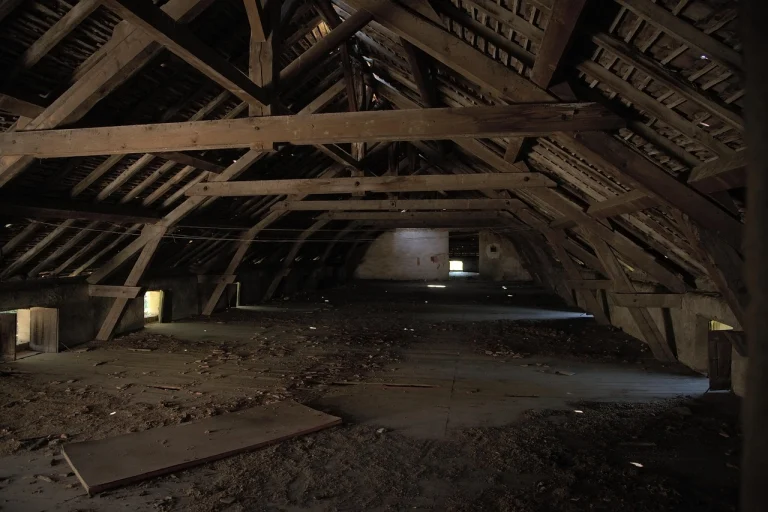
Air sealing the attic means closing the holes in the attic floor that let air from the house leak up into the attic, and doing it before any new insulation goes down and buries them. It is the first job in our air sealing and energy audit guides. ENERGY STAR gives homeowners an order for the job: plug the big holes first (dropped soffits, open wall cavities, the floor under kneewalls), seal around flues and chimneys with metal and high-temperature caulk, close small gaps with caulk or canned foam, and weatherstrip the hatch last. Then insulate, and have a heating technician check that your gas or oil appliances still vent properly. This page follows that order, step by step, with ENERGY STAR’s own list of conditions that mean you stop and call someone.
General information, not professional advice. Building codes are adopted locally, with changes, and your building department decides what applies to your house. Stop and call a qualified professional for anything this page marks as a stop.
Why sealing comes before insulation
In cold weather, warm air rises through a house the way it does in a chimney. It escapes through holes in the top-floor ceiling and pulls cold outside air in lower down, around windows, doors and the basement. ENERGY STAR’s do-it-yourself guide says that in most homes the most significant air leaks are hidden in the attic and basement, not at the windows and doors where people feel drafts (EPA 430-F-04-024, 2016, p. 1.2).
Loose-fill and batt insulation slow heat. They do not stop moving air. The proof is in most attics: ENERGY STAR tells you to look for darkened insulation, which it says is “the result of filtering dusty air from the house”. The air went through, and left its dust behind. Once another foot of insulation is on top, those holes are much harder to find and reach. That is why ENERGY STAR’s attic insulation page says “EPA recommends air sealing the attic before adding attic insulation”.
The model energy code now asks the same of builders: the 2024 International Energy Conservation Code’s air barrier table for new homes (Table R402.5.1.1) calls for an air barrier at any dropped ceiling or soffit and for gasketed attic hatches, pull-down stairs and kneewall doors. That table is for new construction; what applies to work in your attic is your building department’s call.
What it saves, and what nobody can promise
EPA estimates that homeowners “can save an average of 15% on heating and cooling costs (or an average of 11% on total energy costs)” by air sealing and adding insulation together (ENERGY STAR methodology, read 10 November 2026). That is a computer model of a typical house built from 1970 to 1989, in which sealing cuts air leakage by 25% and insulation is brought up to the 2012 energy code. It is not a figure for attic air sealing alone, and the methodology gives none. Savings vary. You may see much bigger promises on other sites. The highest figure in EPA’s table for any climate zone is 20% of heating and cooling costs, and the lowest is 7%. Our savings and payback estimate uses EPA’s figure for your climate zone and shows the working.
Stop first: when this is not a DIY job
ENERGY STAR calls attic air sealing “generally a challenging DIY project” and rates it “difficult”, one to three days. It is a do-it-yourself job only if the attic is accessible and not too hard to move around in. Look before you buy anything. If you find any of these, ENERGY STAR recommends a contractor to correct the problem before you go further (DIY guide p. 1.4 and its attic air sealing project page; the first item is on the project page only, and the ice dam and can light items are in the 2016 guide only):
- Difficult attic access and limited space to work.
- Wet or damp insulation, which points to a leaky roof.
- Moldy or rotted attic rafters or floor joists, which point to a moisture problem.
- Kitchen, bathroom or clothes dryer vents that blow moist air into the attic instead of outdoors.
- A history of ice dams in winter, which ENERGY STAR calls “an indication of serious air leaks”.
- Little or no attic ventilation.
- Knob-and-tube wiring (pre-1930), “which can be a fire hazard when in contact with insulation”.
- Many unsealed, uninsulated recessed “can” lights, which need special care (see the can light step below).
Vermiculite stops the job. Vermiculite is a loose, pebble-like insulation, usually gray-brown or silver-gold. EPA’s instruction is blunt: “YOU SHOULD ASSUME THE VERMICULITE CONTAINS ASBESTOS AND DO NOT DISTURB IT!” EPA says to leave it undisturbed, not to store things or let children play in that attic, not to remove it yourself, and to hire a professional asbestos contractor before any work that would disturb it (EPA, updated 17 April 2026). Air sealing means pushing insulation aside, so it disturbs it. ENERGY STAR’s pages say not to disturb vermiculite “unless you have had it tested by an approved lab”. EPA’s vermiculite page goes further: “further testing is not necessary to take the appropriate precautions”. We follow EPA. Our page on what EPA says about vermiculite insulation has the detail.
Knob-and-tube wiring is a stop too. ENERGY STAR calls this old wiring, run on porcelain knobs and through porcelain tubes, a fire hazard when in contact with insulation. Don’t insulate over or around it and don’t use foam near it. A licensed electrician comes first. See knob-and-tube wiring and insulation.
If the attic passes, ENERGY STAR’s cautions apply for the whole job: walk on joists or truss chords, never on the ceiling drywall or the insulation; watch for nails coming through the roof deck; wear safety glasses, gloves and an OSHA-approved particulate respirator or double-strap dust mask; and in hot weather start early and drink plenty of water.
Find the leaks before you go up
ENERGY STAR’s first step happens downstairs: sketch the floor plan of the top floor. Mark dropped soffits over kitchen cabinets and bath vanities, slanted ceilings over stairways, every place an interior or exterior wall meets the ceiling, and any other dropped-ceiling area. These spots “may have open stud cavities leading directly into the attic and can be huge sources of air leaks”. Take the sketch up with you.
In the attic, the common leak sites are behind and under kneewalls (the short walls of a finished attic room), the hatch, wiring holes, plumbing pipes, dropped soffits open to the attic, recessed lights, and the furnace flue or duct chase. Three signs mark a leak under the insulation:
- Dirty insulation. Dark patches where house air has been filtered through.
- Frost in cold weather. Warm, moist air condensing and freezing where it meets the cold attic.
- Water stains in warm weather, in the same places.
ENERGY STAR says dirty insulation is still fine to use. There is no need to replace it: seal the hole and push it back. If you want the leaks measured rather than guessed at, a home energy audit with a blower door test does that, and an auditor can also flag safety problems.
What ENERGY STAR’s list has on it
- A batt or roll of unfaced fiberglass insulation and 13-gallon plastic garbage bags, for plugging open cavities.
- Reflective foil insulation, drywall or pieces of rigid foam board, for covering soffits, open walls and larger holes.
- Silicone or acrylic latex caulk and a caulk gun, for holes of 1/4 inch or less.
- Several cans of expanding spray foam (the one-part kind sold in a can), for gaps from 1/4 inch to 3 inches.
- High-temperature (heat-resistant) caulk, for flues and chimneys only.
- A roll of 14-inch-wide aluminum flashing, to seal around the flue and keep insulation off it.
- A utility knife, sheet metal scissors, a tape measure, and a staple gun or hammer and nails.
- Boards to walk on if needed, and a bucket to carry it all.
Read the foam can’s label and follow it, wear gloves, and keep foam away from flues, chimneys and light fixtures. Two-part spray foam kits are a different product with different hazards, and are not part of this job.
The order of the job
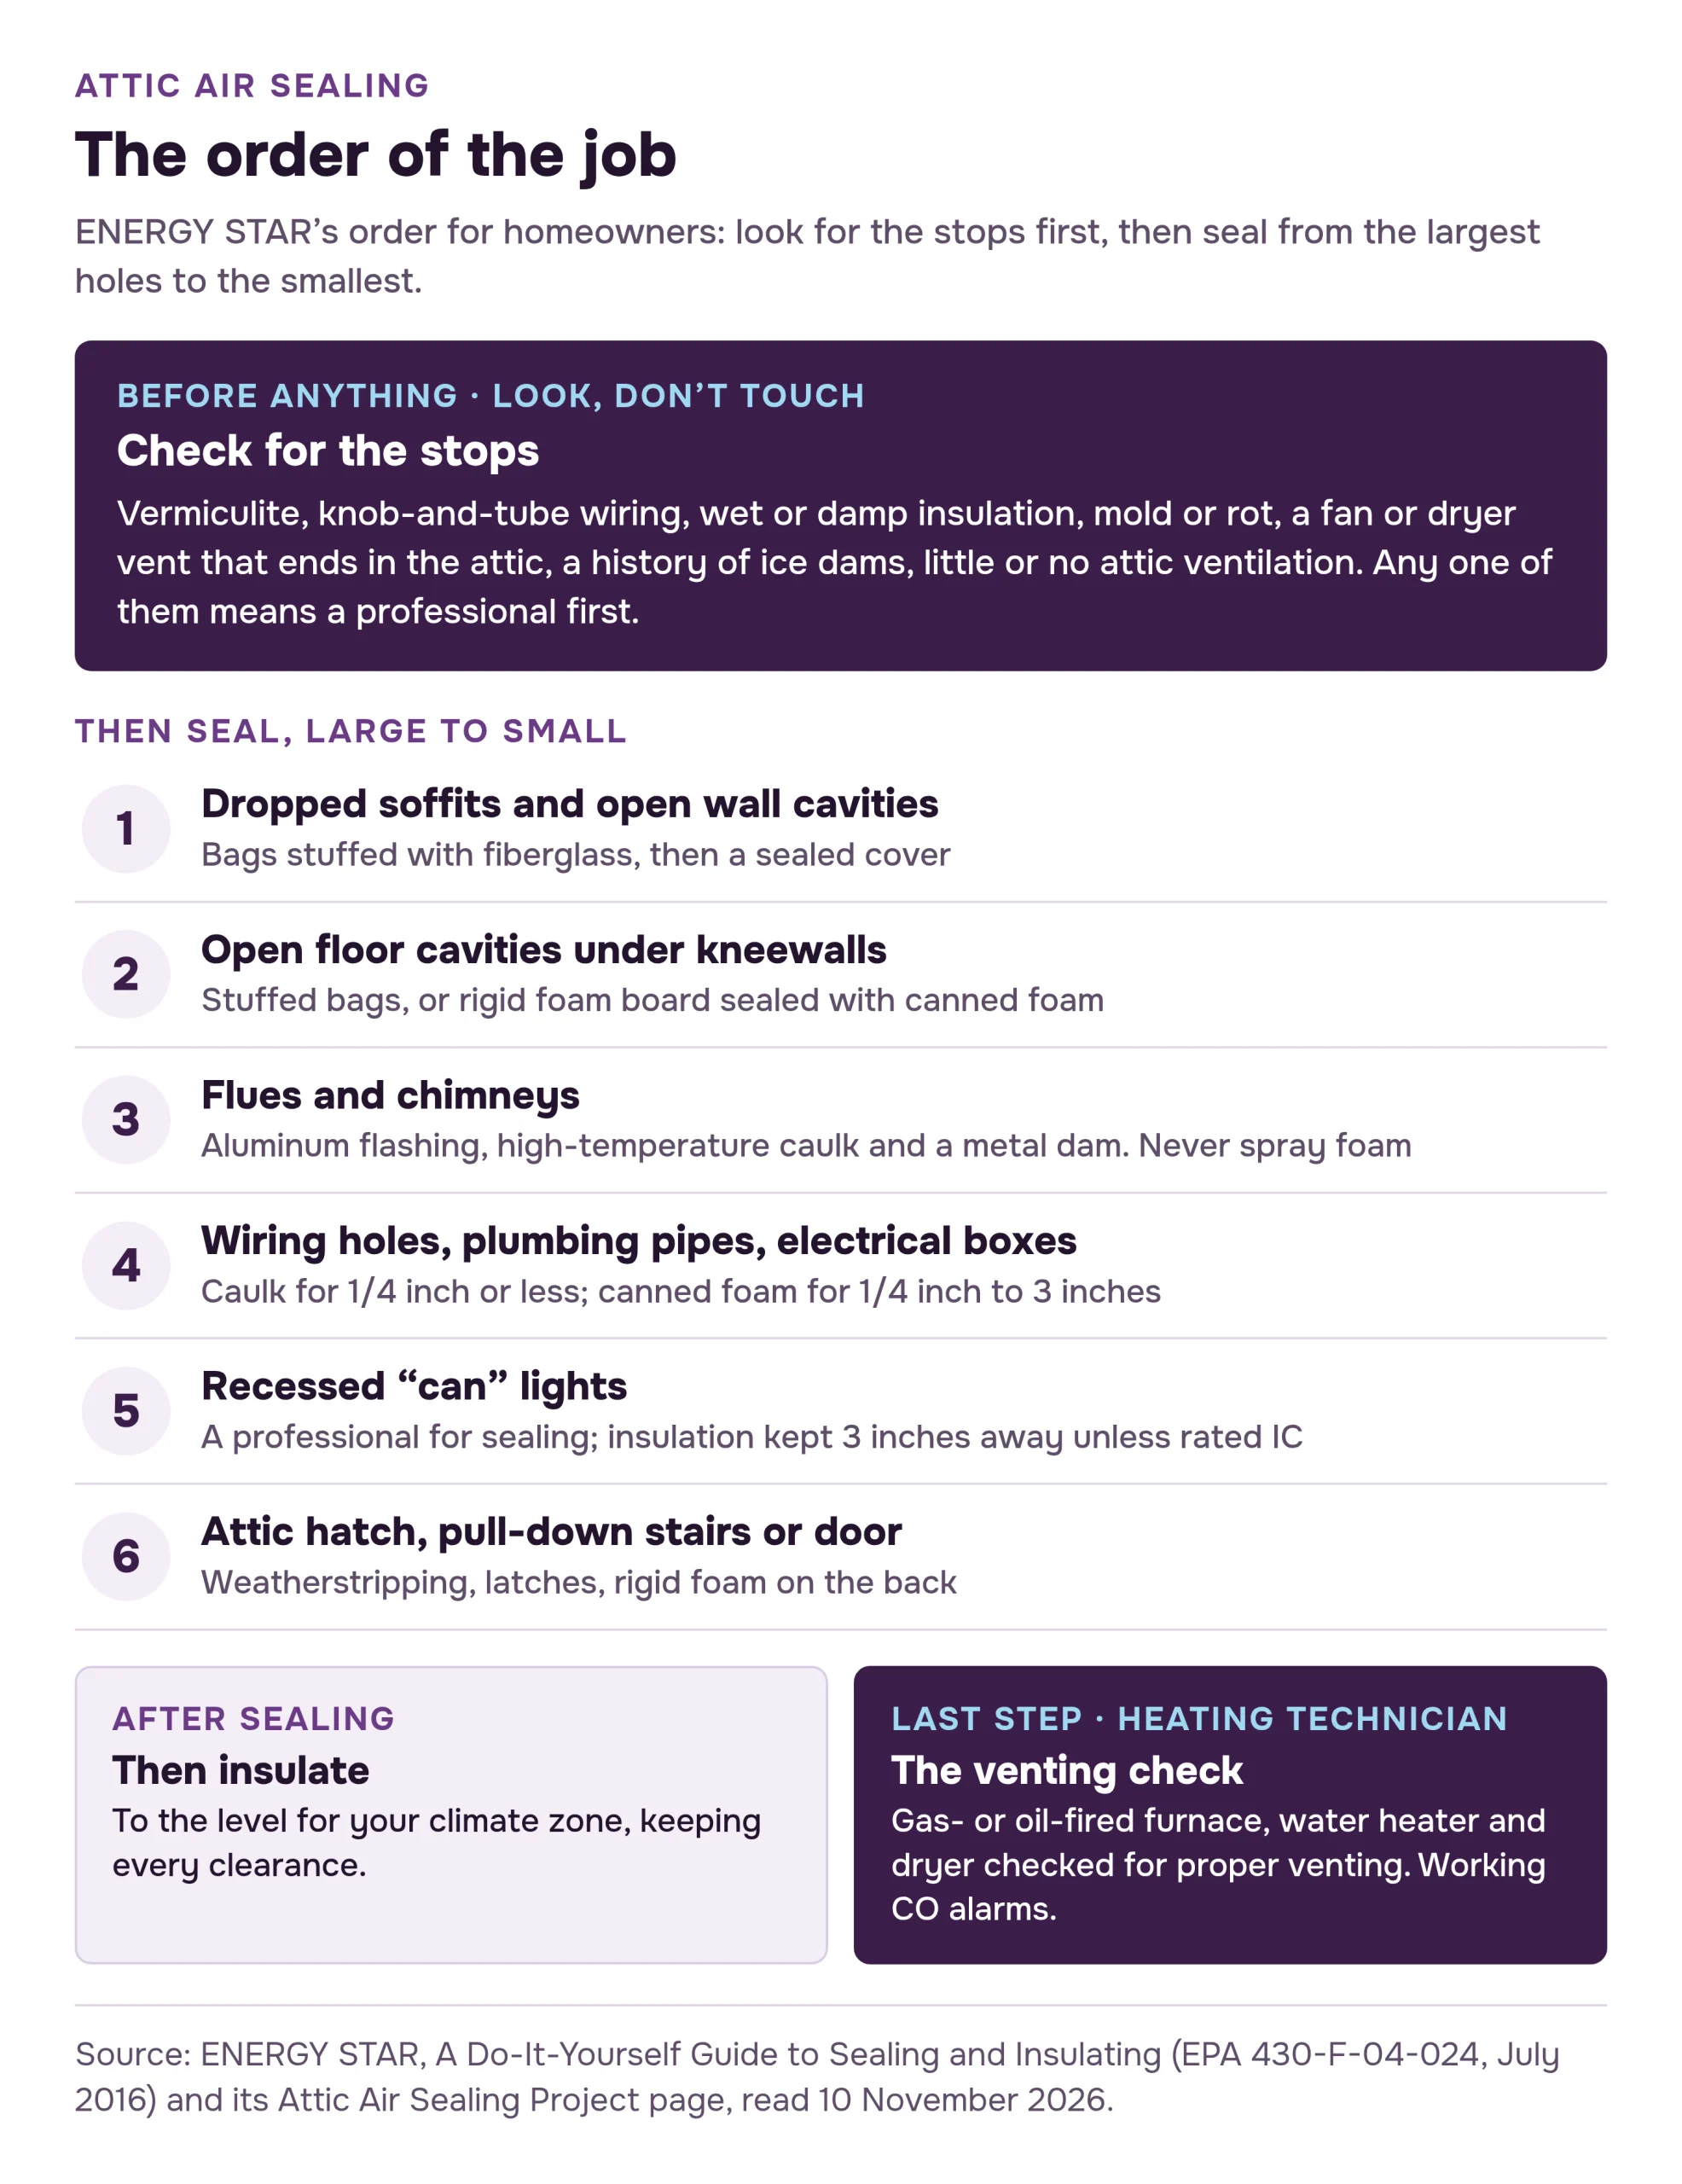
“Don’t worry about finding and sealing all the little holes in your attic,” ENERGY STAR says; “your biggest savings will come from plugging the large ones.” So the order runs from large to small. Every figure in this table is ENERGY STAR’s, from the DIY guide (2016) and the attic air sealing project page, both read on 10 November 2026.
| Step | Where | What ENERGY STAR uses |
|---|---|---|
| 1 | Dropped soffits and open wall (stud) cavities | Bags stuffed with fiberglass, then a cover of foil, foam board or drywall sealed with caulk |
| 2 | Open floor cavities under kneewalls | Stuffed bags, or rigid foam board sealed with canned foam |
| 3 | Furnace and water heater flues, chimneys | Aluminum flashing and high-temperature caulk; a metal dam. Never spray foam |
| 4 | Wiring holes, plumbing pipes, electrical boxes | Caulk for 1/4 inch or less; canned foam for 1/4 inch to 3 inches |
| 5 | Recessed “can” lights | A professional for sealing; insulation kept 3 inches away unless the fixture is rated IC |
| 6 | Attic hatch, pull-down stairs or door | Weatherstripping, latches, rigid foam on the back |
1. Plug the big holes: soffits and open wall cavities
A dropped soffit is the boxed-down ceiling over kitchen cabinets or a vanity. From the attic it is often an open pit with open wall cavities beside it, all hidden under insulation. ENERGY STAR’s steps:
- Push the insulation back and scoop it out of the soffit. Keep it; it goes back on top at the end.
- Make stuffed bags. Cut a 16-inch-long piece from an unfaced fiberglass batt and fold it into the bottom of a 13-gallon plastic garbage bag.
- Fold the bag and stuff it into each open stud cavity. Add more insulation to the bag if it doesn’t fit tightly. Plug every open stud space.
- Cover the soffit. Cut reflective foil or another blocking material (ENERGY STAR says rigid foam board works well) a few inches longer than the opening. Run a bead of caulk or adhesive around the opening, press the cover into it, and staple or nail it if needed.
- Put the insulation back over the cover.
One exception. If the soffit has recessed lights in it, ENERGY STAR tells you to read its can light advice before you go on. Do not cover, box in or bury a light fixture as part of this step.
2. Finished attic? Seal under the kneewalls
Rooms built into an attic usually have open cavities in the floor framing under their short side walls. Insulation piled against the opening does not stop the air, which then travels under the floor of the finished room. ENERGY STAR’s fix is the same bag, a little bigger: a 24-inch-long piece of fiberglass batt in the bottom of a 13-gallon bag, folded over and stuffed into each open joist space under the wall. A piece of rigid foam board sealed in place with canned foam “also works well”. Cover with insulation when you are done.
3. Flues and chimneys: metal and high-temperature caulk only
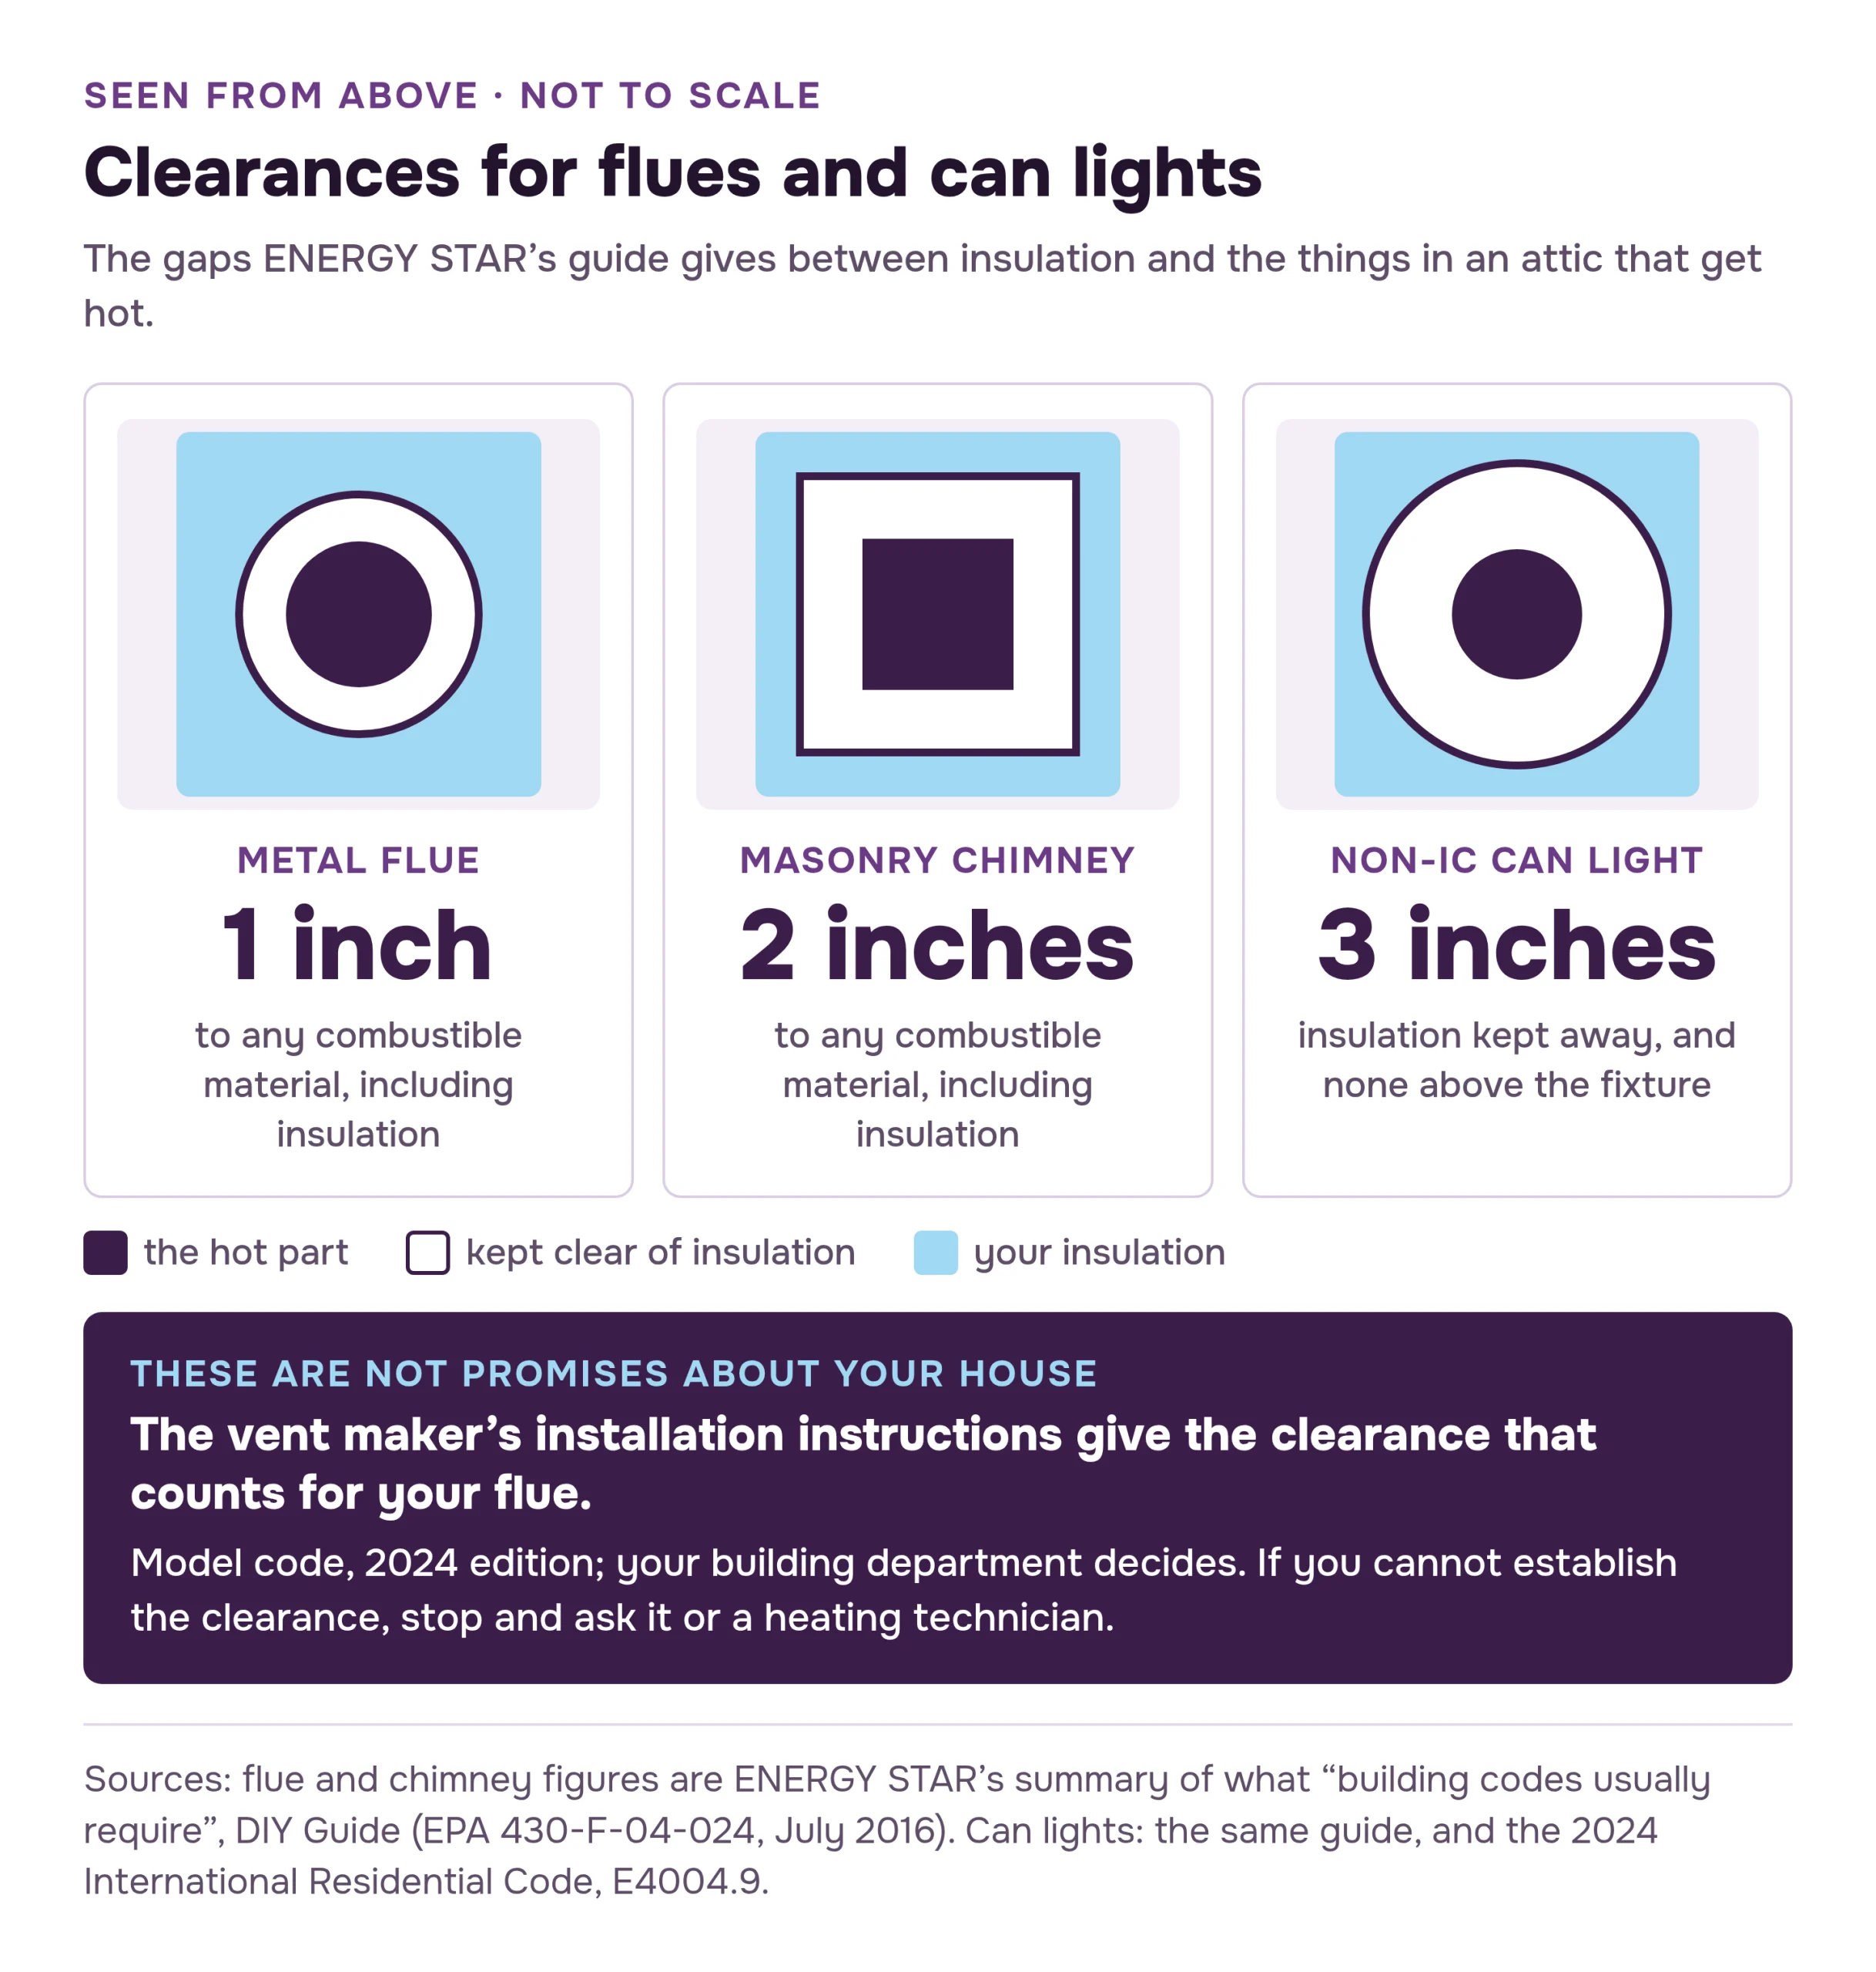
The gap where a furnace or water heater flue, or a chimney, passes through the attic floor can be a major leak. It is also the one place where the wrong material is a fire risk. ENERGY STAR’s wording: “Because the pipe gets hot, building codes usually require 1 inch of clearance from metal flues (2 inches from masonry chimneys) to any combustible material, including insulation.” It adds a caution: furnace flues can be very hot.
- Cut aluminum flashing to fit around the flue. For a round flue, cut a half circle out of each of two pieces so that they overlap about 3 inches in the middle.
- Press the flashing into a bead of high-temperature caulk and staple or nail it down. Where there is no wood, fasten it to the drywall, but not through it.
- Seal the gap between the flue and the flashing with high-temperature caulk. ENERGY STAR: “Don’t use spray foam.”
- Build a dam so insulation cannot touch the pipe. Cut enough aluminum to wrap around the flue plus 6 inches. Cut slots 1 inch deep, a few inches apart, along the top and bend those tabs in. Cut slots about 2 inches deep along the bottom and bend those tabs out. Wrap the dam around the flue and staple through the bottom tabs. Insulation then goes up against the dam, not the pipe.
ENERGY STAR says to use the same technique for masonry chimneys, with the 2-inch gap.
The vent’s own listing governs, not a rule of thumb. “1 inch” is ENERGY STAR’s summary of what codes usually require, not a promise about your pipe. In the 2024 International Residential Code, a model code, gas vents are listed products installed according to the manufacturer’s instructions (G2427.6.1, G2427.6.2), and where a vent passes through an insulated assembly the code calls for a steel insulation shield of at least 26 gauge that keeps insulation back by no less than the clearance in the vent maker’s instructions and, in an attic, ends at least 2 inches above the insulation (G2426.4). So the model code’s shield is steel and taller than the insulation, where ENERGY STAR’s 2016 guide shows aluminum; if you are building a dam, ask your building department which it expects. For masonry chimneys inside the house, the same code keeps a 2-inch air space to combustibles that is not filled, except for noncombustible fireblocking where the chimney passes through a floor or ceiling, and it lists exceptions (R1003.18, R1003.19). The number that counts for your vent is the one in its maker’s installation instructions. If you cannot establish it, or the pipe is single-wall, damaged, serves a wood stove or fireplace, or already sits closer to wood framing than those instructions allow, stop and ask your building department or a heating technician before sealing or damming anything.
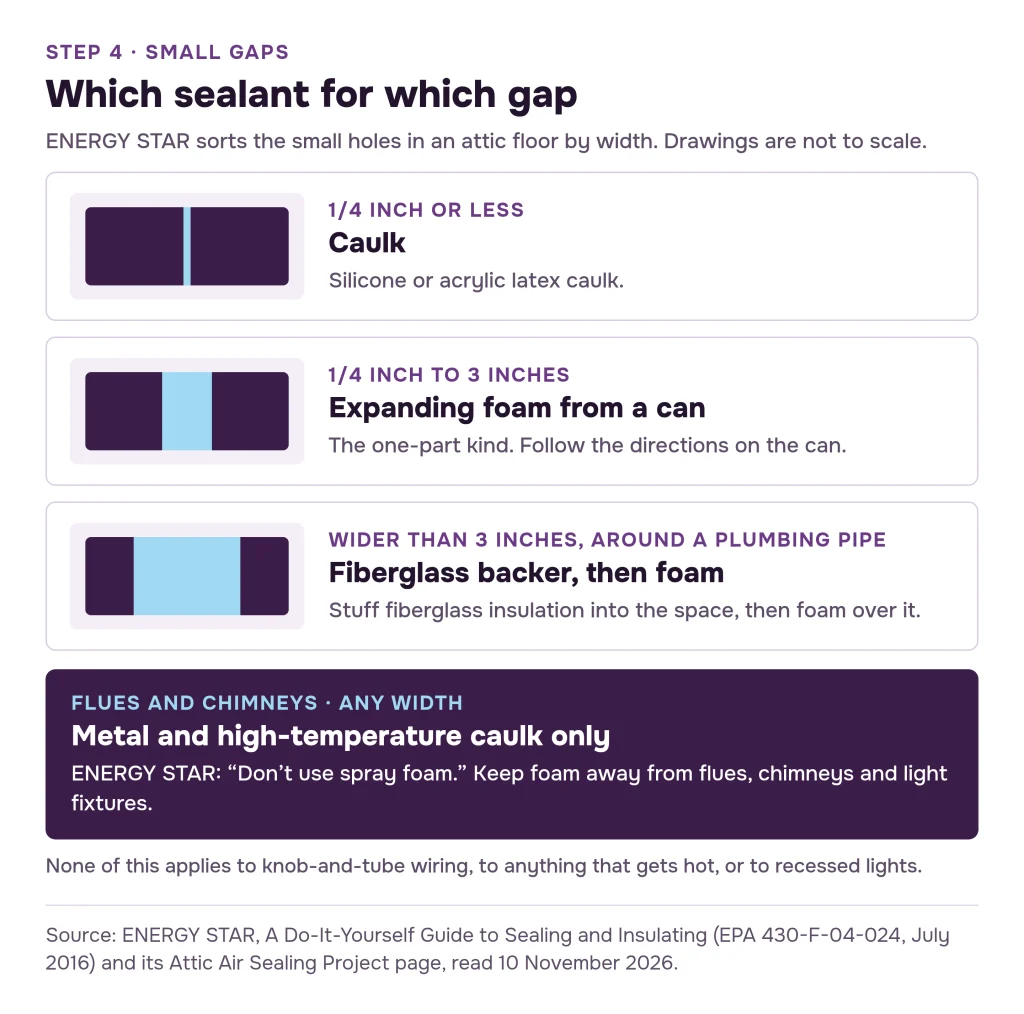
4. Small gaps: caulk to 1/4 inch, foam to 3 inches
Now the many small holes, found by the dirty patches above them.
- 1/4 inch or less: silicone or acrylic latex caulk.
- 1/4 inch to 3 inches: expanding foam from a can.
- Wider than 3 inches around a plumbing pipe: stuff fiberglass insulation into the space as a backer, then foam over it, following the directions on the can.
- Wiring and plumbing holes: ENERGY STAR fills them with expanding foam.
- Electrical junction boxes: caulk around the box, and fill holes in the box with caulk.
- Ducts in the attic: seal where each duct passes through the attic floor with foam, and seal leaky duct joints with mastic or foil tape. ENERGY STAR says household duct tape should not be used.
Let the caulk or foam dry, then push the insulation back. A small rake helps level blown insulation. None of this applies to old knob-and-tube wiring, to anything that gets hot, or to recessed lights.
5. Recessed lights: the leak you mostly leave to a professional
ENERGY STAR’s heading for can lights is “Big Source of Air Leaks, But No Easy Solution”. Its advice to homeowners is to call a professional: recessed lights “can be sealed, but it is difficult and can create a hazard if not done properly with non-combustible materials”, and old-style fixtures need air space around them to shed their heat. What you can do yourself is keep insulation off them:

- Find the rating on the fixture. IC means “insulation contact”: the fixture is built to be touched and covered by insulation. ICAT adds “air-tight”: ENERGY STAR describes ICAT lights as ones “which insulation can touch and are sealed to reduce air leaks”. ENERGY STAR says to check the fixture for the IC designation before insulating. If you cannot find a marking, treat the light as not rated.
- Not IC-rated: “Keep all insulation 3 inches from ‘can’ lights, except those rated IC,” ENERGY STAR says, using a piece of circular metal flashing or wire mesh as a dam. The 2024 International Residential Code, a model code, says the same and more: no insulation above such a fixture or within 3 inches of its enclosure, wiring compartment, ballast, transformer, LED driver or power supply, and its recessed parts stay 1/2 inch from combustible material (E4004.8 and E4004.9, which track the National Electrical Code). Do not box it in with foam board or spray foam at it.
- IC but not air-tight: insulation may touch it, but it still leaks air. Sealing it is the professional’s job ENERGY STAR describes; the other route it gives is replacement with ICAT fixtures, which is electrical work.
For scale: in new homes, the 2024 International Energy Conservation Code wants recessed lights in an insulated ceiling or wall (the code’s “building thermal envelope”) to be IC-rated, labeled as leaking no more than 2.0 cubic feet of air per minute in a standard test, and sealed to the ceiling with a gasket or caulk (R402.5.4). More in recessed lights and insulation: IC-rated or not.
6. The hatch, last
ENERGY STAR finishes with the access hatch, since you are leaving through it. Apply self-sticking foam weatherstripping to the stops the hatch rests on. If the hatch sits directly on the trim, add stops around the opening first: ENERGY STAR uses 1×3 boards, 2-1/2 inches wide, which give a wider surface for the weatherstrip and a place for hook-and-eye latches. Set the latches so the weatherstrip is slightly compressed when they are hooked. Then cut a piece of fiberglass or rigid foam board the size of the hatch and nail or glue it to the back. Pull-down stairs and attic doors get the same treatment: “Treat the attic door like a door to the outside.” Our page on sealing and insulating the attic hatch and pull-down stairs covers the details.
A tighter house: moisture, indoor air and radon
ENERGY STAR says on its project page that sealing “may trap indoor air pollutants such as carbon monoxide, radon and volatile organic compounds (VOCs) and create unsafe conditions”, and that fixing this may take ventilation fans and repairs at the source. Three things follow.
- Bath, kitchen and dryer vents must end outdoors. A fan that dumps moist air into the attic is on the stop list for a reason. Have it corrected before you seal and insulate.
- Sealing is not a radon fix. EPA “does not recommend the use of sealing alone to reduce radon because, by itself, sealing has not been shown to lower radon levels significantly or consistently” (Consumer’s Guide to Radon Reduction, EPA 402/K-10/005, 2025 edition). And a tighter house can hold more of what gets in. ENERGY STAR’s line: “After reducing air leaks, EPA recommends getting a test kit to check the Radon levels in your home.” EPA’s page on finding a radon test kit says where to get one.
- Combustion appliances need a check. This is the last step of the job, below.
Then insulate
With the holes closed and the dams in place, the attic is ready for more insulation. How much depends on your climate zone and what is there now: the how much insulation do I need tool gives ENERGY STAR’s target for your zone, with the 2024 code minimum for new homes beside it. Keep the eave vents open as you go, and keep every clearance you just built: nothing inside the flue dam, nothing within 3 inches of a non-IC light. The whole sequence, from checks to the last bag, is in attic insulation: what to check, what to add, and in what order.
Last step: the venting check and CO alarms
Appliances that burn gas or oil need air, and many rely on the natural draft of their flue to carry exhaust out. In a tightened house, exhaust can be pulled back down the flue instead. ENERGY STAR puts it this way: “Sealing in some cases can cause naturally venting combustion appliances to back-draft gases back into your home, creating unsafe conditions.” EPA lists back-drafting from furnaces, gas water heaters, wood stoves and fireplaces among the sources of carbon monoxide in homes (EPA, updated 15 July 2026).
So the job is not finished when the hatch closes. ENERGY STAR’s instruction:
After making energy improvements that result in a tighter house, there can be an increased opportunity for CO to build up if your gas-burning appliances are not venting properly. Have your heating and cooling technician check your combustion appliances (gas- or oil-fired furnace, water heater, and dryer) for proper venting.
ENERGY STAR, A Do-It-Yourself Guide to Sealing and Insulating (EPA 430-F-04-024, 2016), p. 2.1
Its project page goes a step further and suggests having the appliances tested before the work as well as after. If you have any appliance that burns gas, oil, propane or wood, book that check when you plan the job, and tell the technician the attic has been air sealed.
Keep working carbon monoxide alarms as well. EPA says CO alarms “should be considered a back-up to BUT NOT A REPLACEMENT for proper installation, use, and maintenance of fuel-burning appliances”, and that an alarm belongs “in the hallway near every separate sleeping area”, certified to the current UL 2034 standard (EPA, updated 16 September 2026). Follow the instructions that come with the alarm, and check what your state or city requires. If people in the house get headaches, dizziness or nausea that ease when they leave, EPA’s advice is to get fresh air immediately, turn off combustion appliances, leave the house and go to an emergency room (EPA’s CO fact sheet).
Your next step
- Look, don’t touch. From the hatch, with a flashlight, check for the stops: pebble-like vermiculite, knob-and-tube wiring, wet insulation, mold or rot, a fan duct ending in the attic. Any one of them means a professional first.
- Read two labels: the marking on each recessed light (IC, ICAT or neither), and whatever the flue pipe says about its maker and type, so its installation instructions and clearance can be looked up.
- Sketch the top floor, then work large to small: soffits and open cavities, kneewalls, flues, small gaps, the hatch.
- Ask your building department which code edition it enforces, if you are unsure about a clearance or a permit.
- Book the venting check with a heating technician, test the CO alarms, and order a radon test for after the work.
Sources checked on 10 November 2026: ENERGY STAR’s attic air sealing and attic insulation project pages, its DIY guide (EPA 430-F-04-024, July 2016) and its savings methodology; EPA’s pages on vermiculite, carbon monoxide and CO alarms and its Consumer’s Guide to Radon Reduction (EPA 402/K-10/005, 2025); and, as model codes on the International Code Council’s site, the 2024 International Residential Code (G2426.4, G2427.6.1, G2427.6.2, R1003.18, R1003.19, E4004.8, E4004.9) and the 2024 International Energy Conservation Code (R402.5.4, Table R402.5.1.1). The National Electrical Code itself was not read.
Sources
- ENERGY STAR, Attic Air Sealing Project (live page, read 10 Nov 2026)
- ENERGY STAR, A Do-It-Yourself Guide to Sealing and Insulating with ENERGY STAR, EPA 430-F-04-024 (July 2016)
- ENERGY STAR, Attic Insulation Project (live page, read 10 Nov 2026)
- ENERGY STAR, Methodology for Estimated Energy Savings (live page, read 10 Nov 2026)
- EPA, Protect Your Family from Asbestos-Contaminated Vermiculite Insulation (updated 17 Apr 2026)
- EPA, Carbon Monoxide's Impact on Indoor Air Quality (updated 15 Jul 2026)
- EPA, What about carbon monoxide detectors? (updated 16 Sep 2026)
- EPA, Protect Your Family and Yourself from Carbon Monoxide Poisoning (read 10 Nov 2026)
- EPA, Consumer's Guide to Radon Reduction: How to Fix Your Home, EPA 402/K-10/005 (2025)
- EPA, Find a Radon Test Kit or Measurement and Mitigation Professional (updated 30 Dec 2025)
- 2024 International Residential Code, Chapter 24 Fuel Gas, G2426.4 and G2427.6 (model code, read in a browser 10 Nov 2026)
- 2024 International Residential Code, Chapter 10 Chimneys and Fireplaces, R1003.18 and R1003.19 (model code, read 10 Nov 2026)
- 2024 International Residential Code, Chapter 40 Devices and Luminaires, E4004.8 and E4004.9 (model code, read 10 Nov 2026)
- 2024 International Energy Conservation Code, Chapter 4 [RE], R402.5.4 and Table R402.5.1.1 (model code, read 10 Nov 2026)